CAITLYN THOMPSON ORIGINAL BOOKBINDING, BOX MAKING, AND PHOTOGRAPHY

Showing posts with label Repair. Show all posts

Sunday, March 18, 2012

Etherington Repair


Problem: Cover is totally ripped from the rest of the book.
Solution: Etherington tissue repair.

I've told you how this goes in a previous post. Same deal, same awesome results. Woot woot to toning tissue.

BEFORE AND AFTER


S'more Haverford Rebacks. Note: No Marshmallows Involved.


Watson's Annals of Philadelphia were in severe need of a makeover. I nipped, tucked, toned and trimmed. These better looking (and more confident) books are ready to mingle with the world again.

Or they might just stay in their boxes and remain forever young.

BEFORE AND AFTER
VOLUME 1


VOLUME 2


Wednesday, July 20, 2011

Mission: Tone It


Using a technique that Martha Kearsley taught me, which I believe was conceived of by Don Etherington, I toned tissue until I saw stars, filled losses and repaired the cover to this thin and rare gem. The biggest challenge was toning as the cloth on the spine and cover boards changed in color so drastically.


Welcome to Haverford College - Treat This, Please.


This summer I am a Conservation Intern at Haverford College. I hit the ground running a few weeks ago and have loved the fast environment. I was worried I wouldn't be able to apply my speedy ways to conservation, but I was wrong. While mending can be slow at times, I find the entire process of treatment exciting and oddly spunky. Never know what attitude a book will throw at me. Studying the objects, planning treatments and being in complete control of execution has been rock solid. Below, I share with you my first project here at the Magill Library in hot and humid Haverford, PA.

Love and Truth, by Luke Howard, a rare Quaker book from Special Collections needed a complete conservation treatment which included washing, de-acidifying, re-sizing, paper mending, re-sewing, rounding, and re-casing. Below are some photos from the epic process.

WASHING


PAPER MENDING - BEFORE AND AFTER


SEWING


COVERS - BEFORE AND AFTER


ENCLOSURE FEATURING COMPARTMENT FOR ORIGINAL COVERS


I'm proud.

Saturday, May 15, 2010

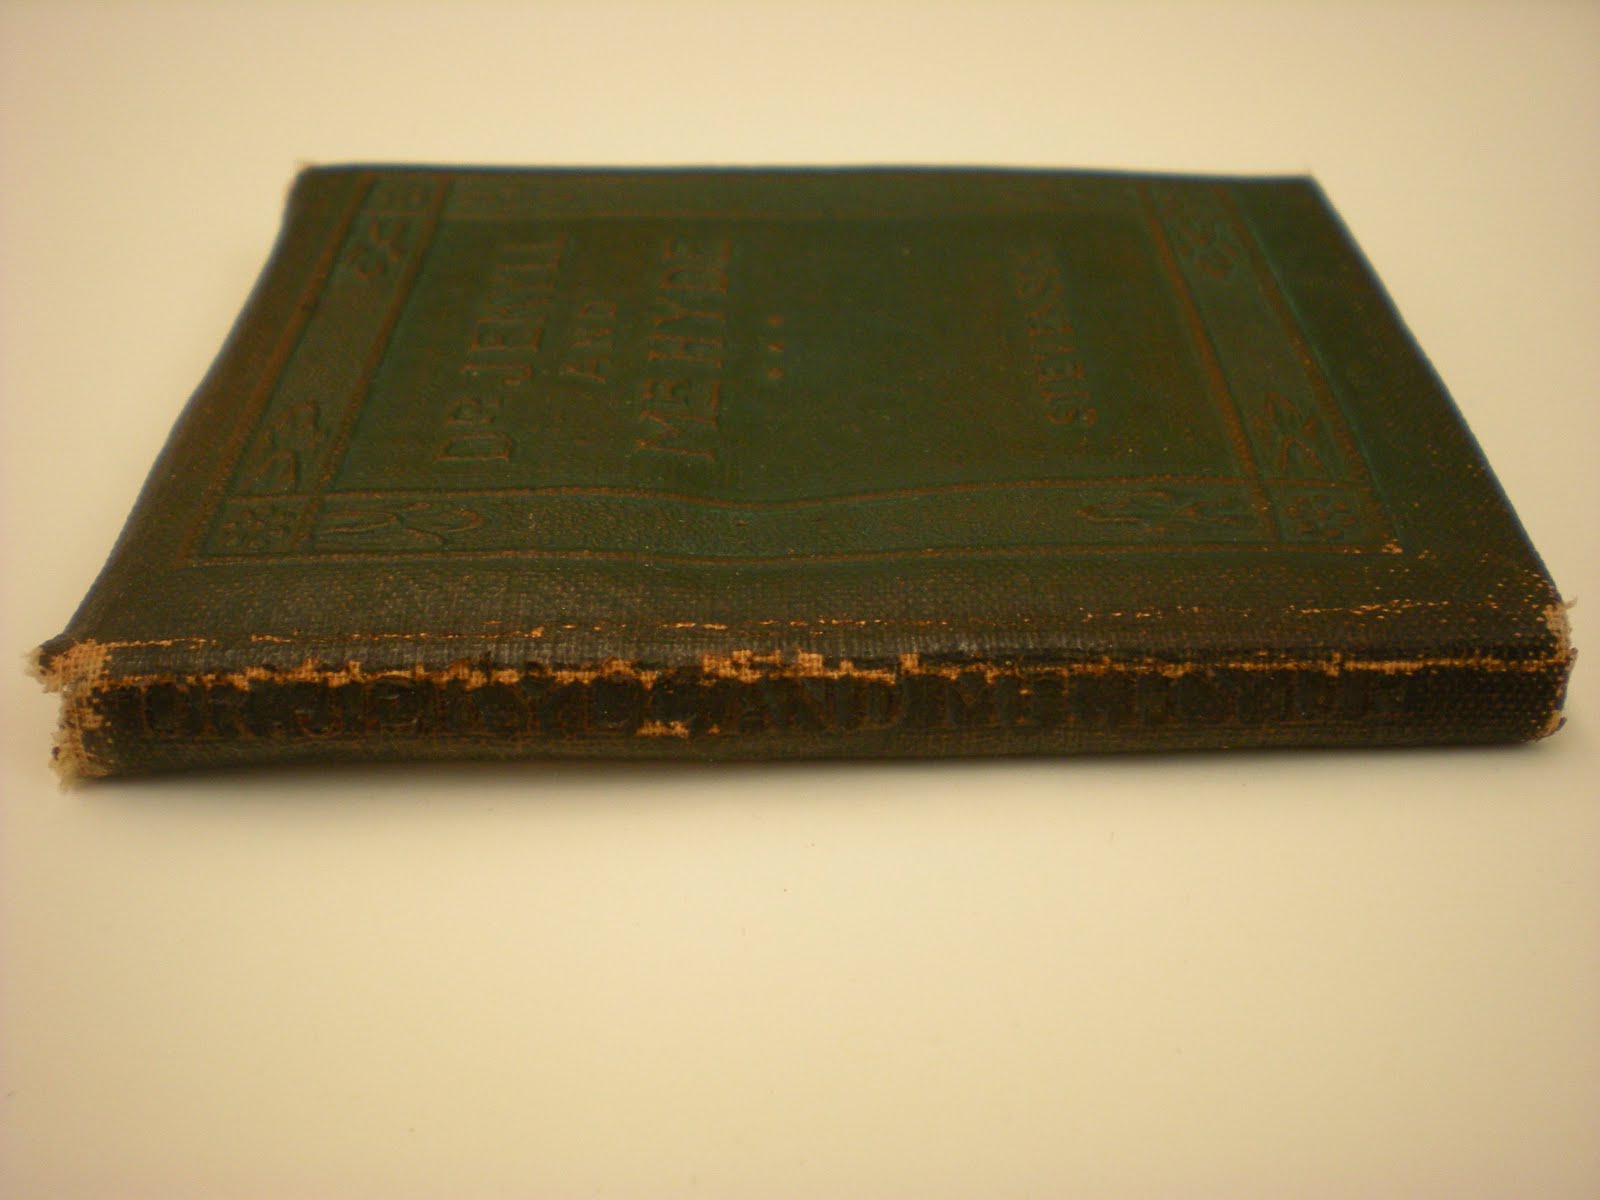
The Strange Case of Dr. Jekyll and Mr Hyde - An Adventure of Paper Repair with a Limp Leather Finish


I found a tiny leather copy of Dr. Jekyll and Mr. Hyde in a used bookstore here in Providence. Gross and rusty green I thought this would look great in a different leather cover.


The paper inside, burned from the acid of the leather, needed a lot of repair. Because the few fragile sections were completely uneven, my first task was to take everything apart. Thread was cut, pages (folios) were separated. The rips and tears through the creases of the folios would need mending and new strength if I was to sew through them again.


I toned some Kizukishi (japanese tissue paper) to match the darkened paper and prepared some wheat paste. The tiny strips of tissue were applied carefully with tweezers onto the missing or cracking pieces of the pages. Everything sat for about twenty minutes or so under weight to ensure proper adhering.

After the paper had been repaired I found thread that matched the original thread used and sewed the sections back together. The story was ready for a limp leather case. If you scroll below you can read about the Limp Leather process.


While the book looked snug and pretty in it's new leather case, strong and true, it lacked something. A title. A gold title.


Hope you've enjoyed!


Friday, May 7, 2010

The Worthy Candidate - The Casing of My First Book with Content


One of my favorite books is William Faulkner's As I Lay Dying. I was introduced to the novel during my senior year of high school and still love it five years later. A classmate of mine recently found an icky copy of it featured in a two in one book. Sound and the Fury was great too so I thought this book deserved some love.

I used the quarter binding structure for this project. After man handling the leather with the Scharfix and my knives, I molded it onto the book's new case. I use a stone marbled paper as the decorative paper,which I received as a present last winter.

While the case dried I used a Kwikprint Stamping machine and stamped the title onto a thin thin thin thin thin piece of leather in gold, which later was applied to the spine.

Below are some before and after shots of the beautification process and my latest Box creation.


I love boxes. I love leather. Latest Assignment - Leather Spine Box. This Faulkner project deserved the best housing so here lies my newest box.


Sunday, April 18, 2010

A Different Kind of Cradle


So as I hope you have seen a few posts earlier, I made a drop spine box with a cradle -- a wonderful home for any book, but sometimes a not-so-easy-to-properly-operate home. I noticed that whenever I opened the box, one tray would always fall open slightly. The other tray is held down by the weight of the book and gravity of course.

With some writhing and catching and hand eye coordination the cradle box can be opened easily. I thought my cradles would forever be a challenge until I discovered a post on the blog of Jeff Peachey, an amazing knife and tool man. His cradle was different. It was simple. It was a breeze to produce. It was pretty. It was glory. And I felt glorious.

The cradle of the "B tray", as it's called, doesn't really exist. No flapping cradle attacks the fingers of a curious person venturing into the box. No... no, no. The box opens and voila! An empty, tidy B tray. In the other, the A tray, lies a neat, cozy-like structure housing and hugging the book within. Check this gorgeousness out. Boxes never cease to surprise me.


See empty B tray heaven on the left above?


Hope you've enjoyed!

If you have items you'd like to house in a cradle box or a regular drop-spine clamshell box, please email me and we can discuss plans for shipping to and fro and pricing details for the production work.

Love hugs?
Book + Box = hug.
Book + Box with Cradle = Everlasting Embrace